MakeSEA Project Search
Create your first  project
Before creating a project, we encourage you to view an example project to get a sense to how your project will look when you finish and publish it.
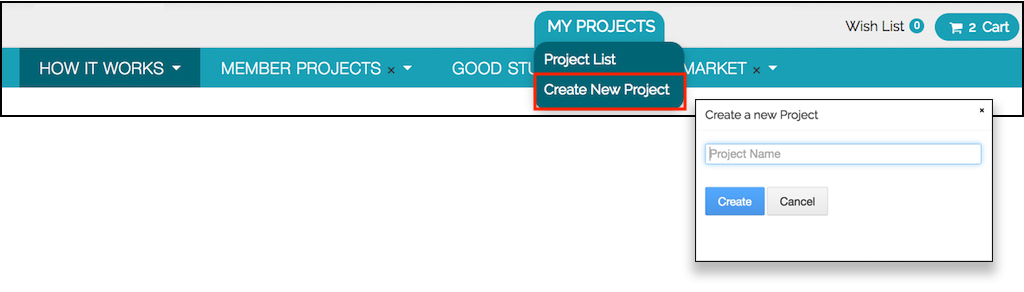
Sign to makeSEA licensed by the UAB Libraries in with your BlazerID and password. Hover over the My Projects tab and click on Create New Project. This prompts a pop up for you to create a name for your new project, then takes you to the page where you will be able to upload everything to your project.
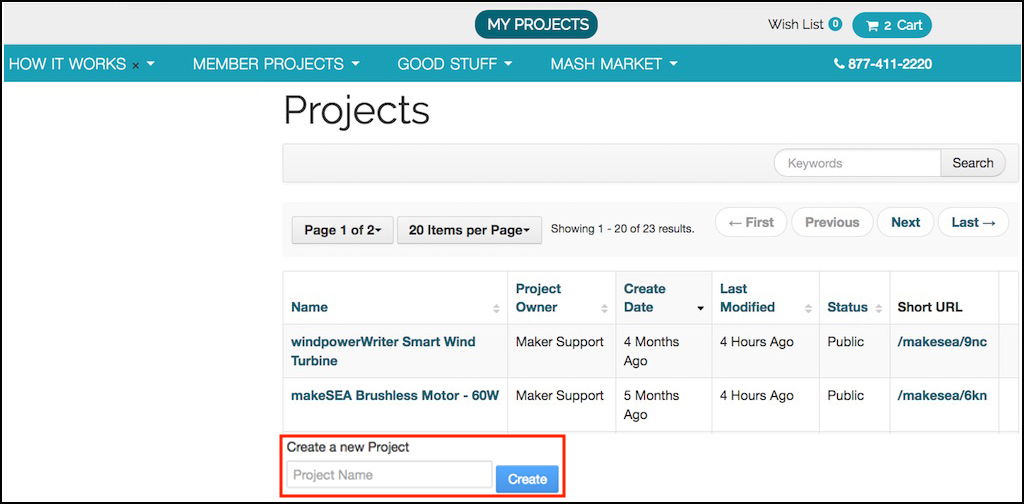
The Project List will redirect you to a page with a list of all of your projects (see below). NOTE: If you are new to makeSEA, there will not be anything in your project list. After creating projects you will be able to see a list of all your projects and their statuses on this page. This page also shows the create date, last modified date and the short URL for your projects.
Set up your project page
THE URL
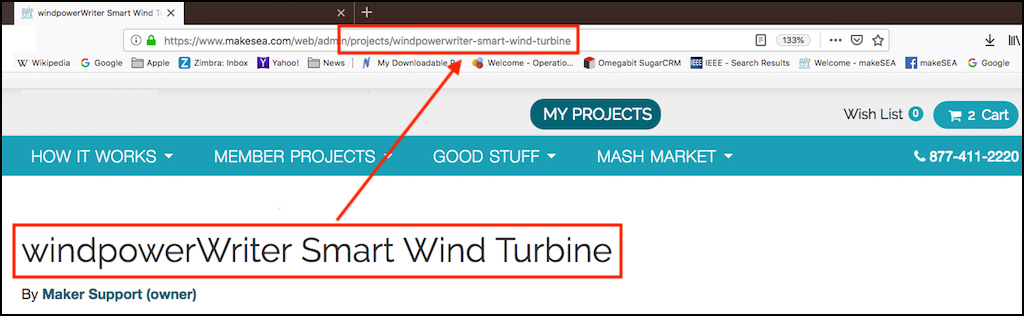
The first item you should notice when you arrive at your project page is that the title of the project is directly linked to the URL. If you change the title of your project at a later time a prompt will pop up and remind you that the URL will change with the title. If you have shared this URL, remember to update the person(s) or site(s) with the new URL. The old URL will go to a page not found.
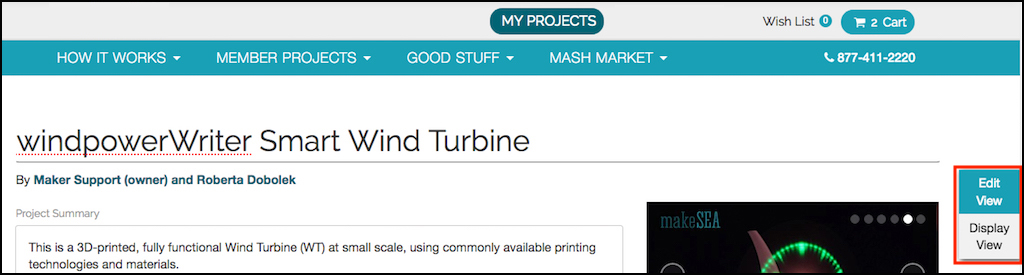
EDIT VIEW and DISPLAY VIEW
When you are setting up a project you must be in the Edit View to change or add text, photos or assets. The Display View will show you how your project will display once it is published.
THE CONTENT EDITOR TOOLBAR
When in the Edit View on your project page, both the Project Summary Area and the Project Detail Area have a pop-up Content Editor Toolbar which displays when you click into either box.
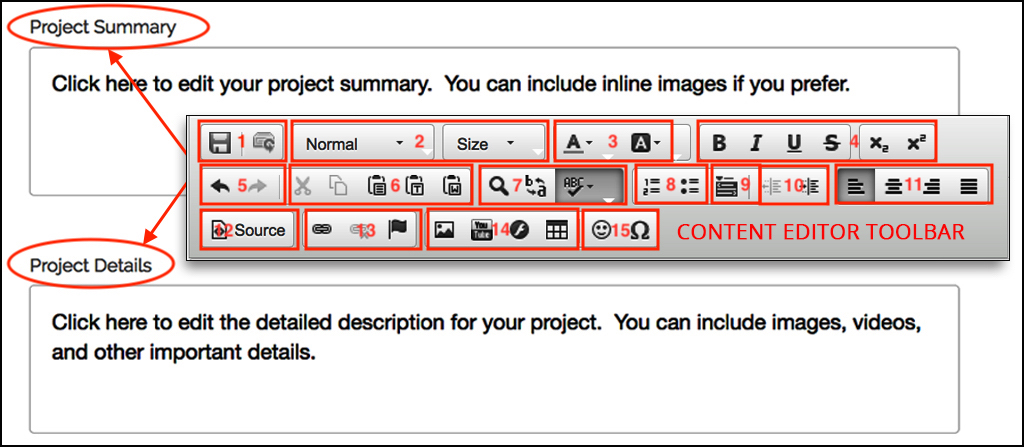
Some functions of the Content Editor Toolbar:
- Save changes as you edit or restore original content
- Choose text as heading or regular text and specify size
- Choose text color or background color
- Choose text style
- Undo and redo
- Basic cut, copy, paste functions
- Search, replace, spell check
- Insert lists
- Collapsible Content (see below)
- Indent
- Alignment of text
- Source - this tool is useful for those who know html code. Click here to edit in the Source Code. Using this tool you can toggle between the text box and the source code.
- Insert a hyperlink, highlight the text and click on this symbol to add the link; add an anchor to your text
- Add a picture, add YouTube video, Insert a video using flash, add a table
- Add emoji or special character
ADDING A PROJECT SUMMARY
As always, be sure you are in the Edit View before adding a summary. The summary is the description that appears next to your main image when people are looking through all of the projects. The summary should briefly describe what your project is. When you type in the summary box the content will remain in draft mode (indicated by the draft background text) until you click on the SAVE icon (#1 above) in the Content Editor. Although it is possible to, it is not recommended that you include "inline images" in the summary section. Including inline images at this stage will affect the thumbnail image that appears on the list of projects.
After you save the content ion the Project Summary box, switch to the display view and check to make sure your text is there. Remember, you can edit your content at any time by logging into the system and navigating to your project.
ADDING PROJECT DETAILS
Project Details is meant to be a running journal on the project. Add to and edit this content as you progress with your project. This area can include any data, descriptions, and photos relevant to the project. This could be anything from the settings on your 3D printer to what material you used, to tests done to see how it compares to similar designs.
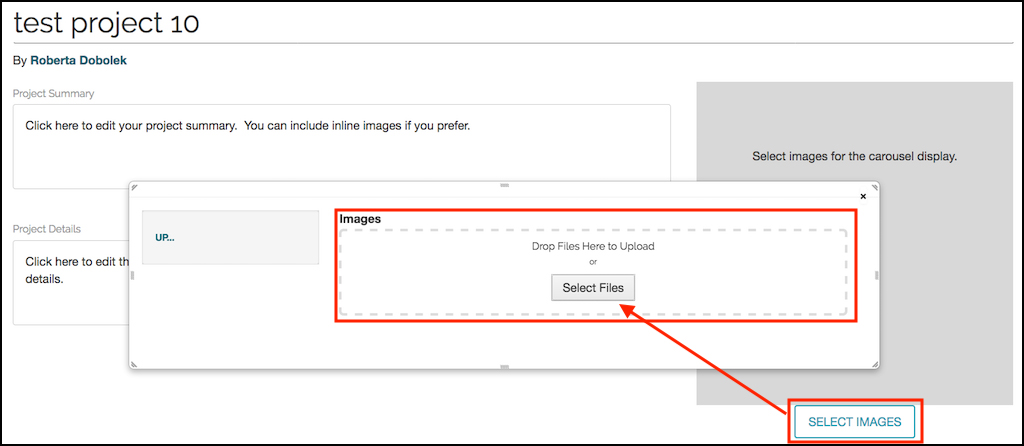
ADDING IMAGES
First, be sure you are in the Edit View mode. To upload photos for a project, click on SELECT IMAGES. This will bring up a box where you can drag and drop the image files or by clicking on the Select Files button you can choose the files you want to upload. Remember, you can add images to this section at any time as your project advances.
THE CAROUSEL
The Carousel is a revolving display for the images you want to include with your project. It appears on the right hand side of your Project page. This will be populated by the images you choose from those you have uploaded.
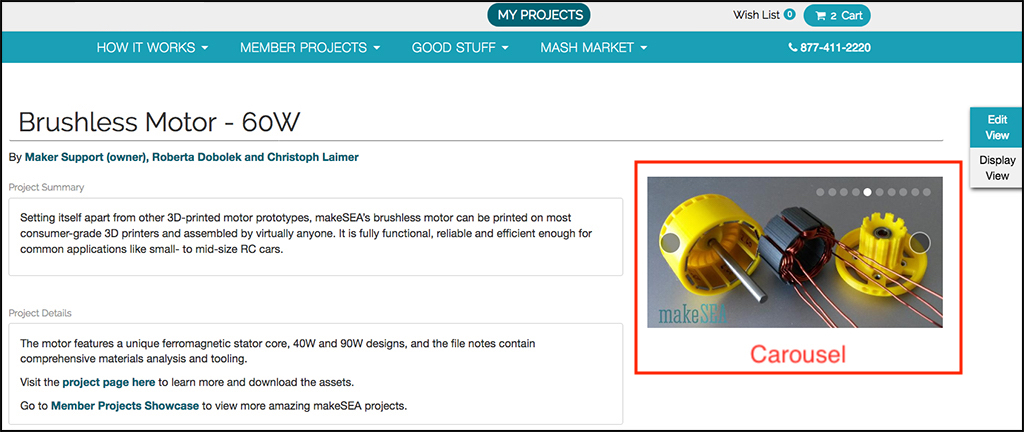
After uploading photos, (1) choose which image you want as the main image. In addition to being the first image in the Carousel, this will be the thumbnail that people see when looking through all of the projects. To add other images to the carousel, (2) simply choose those photos you want included in the carousel. (3) You do not have to include all the photos you uploaded in the carousel.

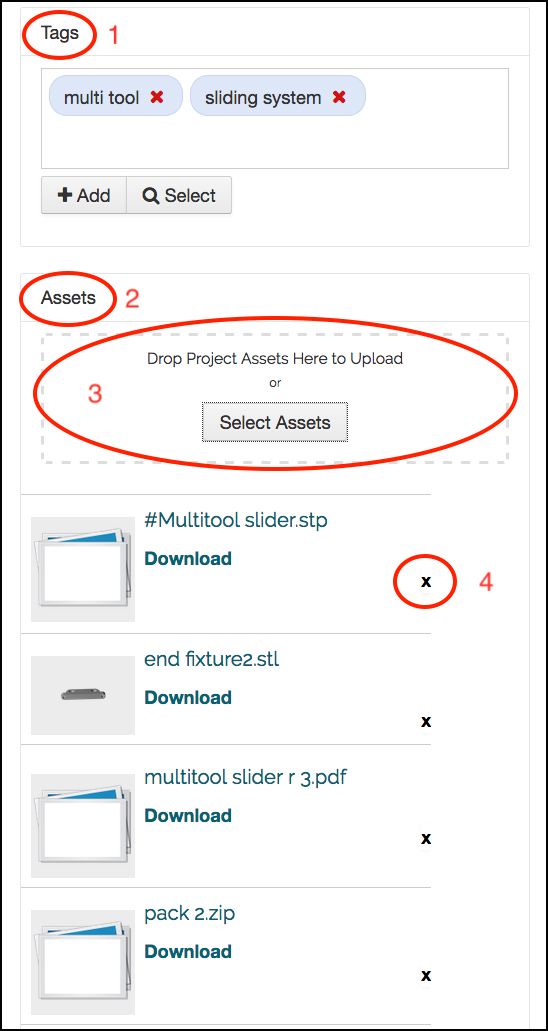
ADDING TAGS
(1) Under the Select Images button on the right hand side is a place to include Tags that will help others find your project(s). A tag is a label associated with your project. This identifying or descriptive marker(s) should be relevant to your project. To add a new tag click on the + sign and type in the tag name. Each tag you create for your project is visible under the Select button. Applying a tag or multiple tags to your project is optional.
ADDING ASSETS
(2) Assets are the files you use to print your 3D project. These can be any kind of file that is used to print or assist with completing the project. Note below that the author has included printer files (stl, stp), PDFs and even zip files. When you add an asset to your project, the system will automatically take all of the data it can from the file you upload and display it under Protected Asset Metadata. Some file types provide more metadata than others. When someone visits your project page all the files you have uploaded will be visible and available (based on the permissions you have established).
(3) Assets are added to the project the same way images are - either by a drag and drop method or by clicking on the Select Assets button and choosing your files.
(4) The X to the right of each asset will let you delete an asset at any time.
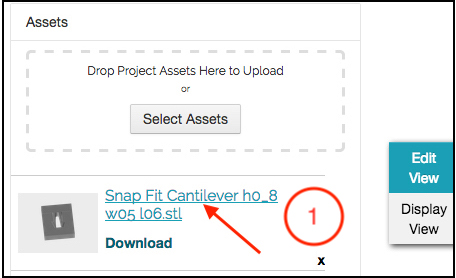
EDITING ASSETS
If you edit an asset that has already been uploaded to the system, you can upload it as a newer version of the original asset. This feature will allow you to track how many different versions you have gone through to get to your final one.
To utilize the version control feature, you will need to access the original asset. (1) Click on the original file showing up in the asset list.
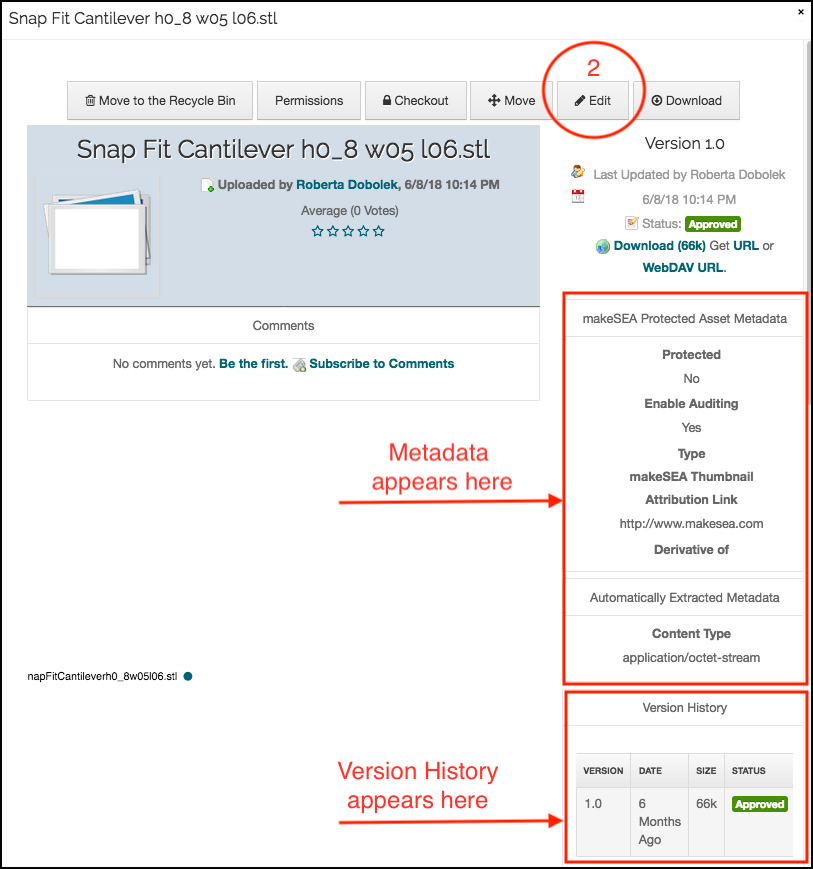
Clicking on the asset will take you to the next screen shown below. On this screen you will see the metadata related to your asset and the Version History. The version history changes as you save a new version of the asset. The original asset you uploaded was version 1.0. When you upload the next version it will show in the list as 1.1 then 1.2 etc. (2) To upload the new asset click on the Edit tab.
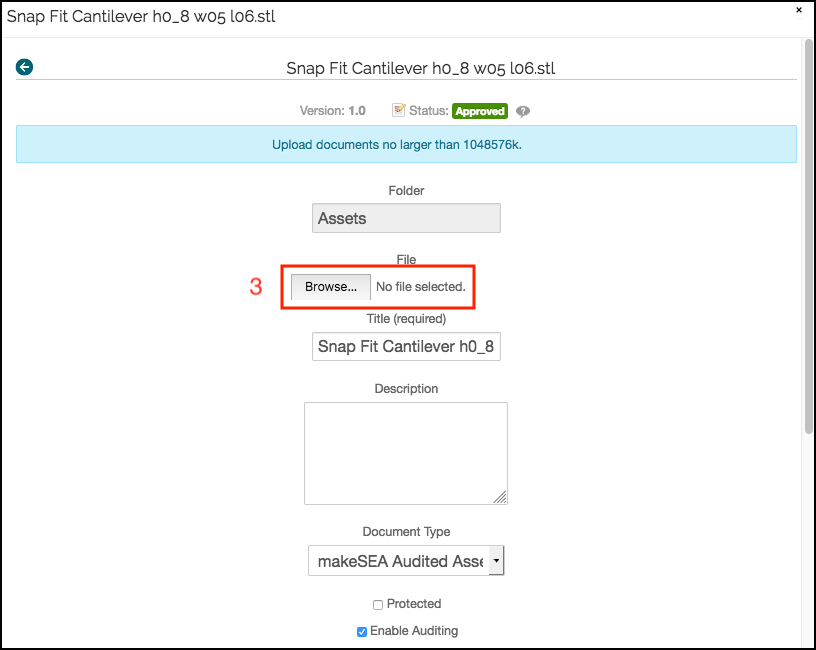
The Edit tab will take you to the next screen below (3) where you will browse for and upload your new version of the asset.
Saving your Project Page
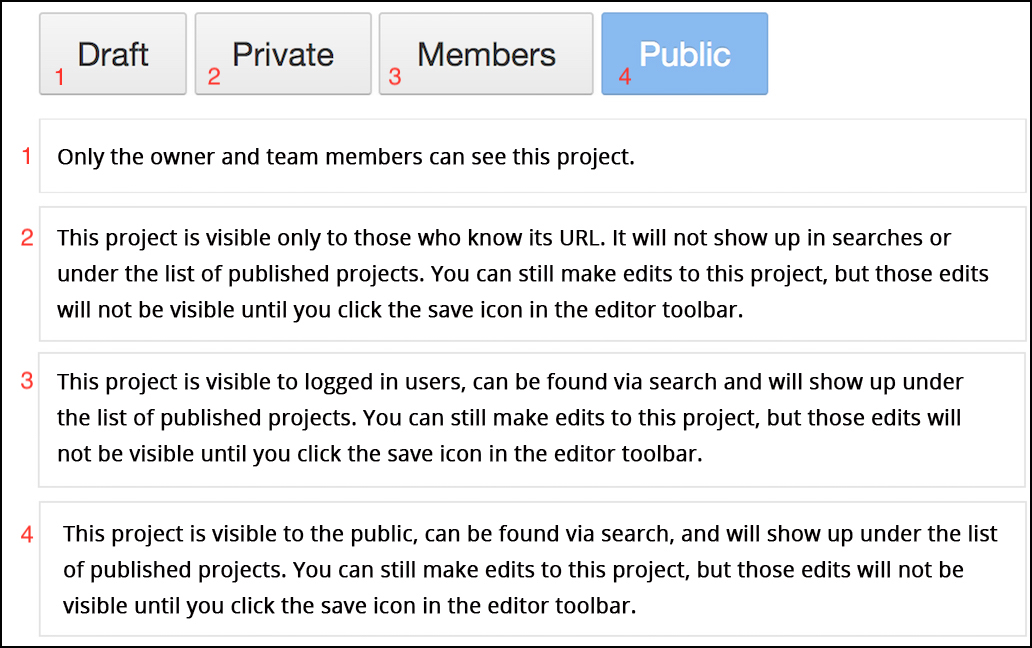
When you are ready to save your project page there are 4 choices (Draft, Private, Members, and Public) at the bottom of the page. See below for an explanation of each mode. Choose the one that works best for your project and how you want it to be viewed. Remember you can return to your project page at any time to change, update or add to the content files and images and even change how you have the project saved.